**This DIY blog post is sponsored by Michaels. All thoughts, opinions, ideas, and content creation are my own. Thank you Michaels for sponsoring this fun DIY how-to tutorial!**
Let’s make some custom DIY Fall Signs! 🍁🍂 Today, I’m sharing 2 different ways (vinyl or paint) on how to make a DIY fall sign! Let's have fun and create together!
This DIY Fall-themed Wood Sign was inspired by my love for lettering, vinyl and paint!

Supplies:
Silhouette Cameo 4 Machine, Cutting Mat, Vinyl + Transfer Tape, Wood Sign, Paper Trimmer, Acrylic Paint and Princeton Paint Brushes

Yayyy! It's time! Let's make some DIY Wood Signs together!
Step One: Design your artwork for the wood sign!
TIP: I also recommend taking a photo of the wood sign to mock-up your design!
Step Two: Place the vinyl on the cutting mat and then send your design to the Silhouette Cameo machine to start the cutting process.
Method 1: Applying the vinyl directly on the wood sign.

Step 1: Carefully remove the excess vinyl and the negatives inside each letter.
Step 2: Cut the vinyl and transfer tape to size in order to match the wood sign.
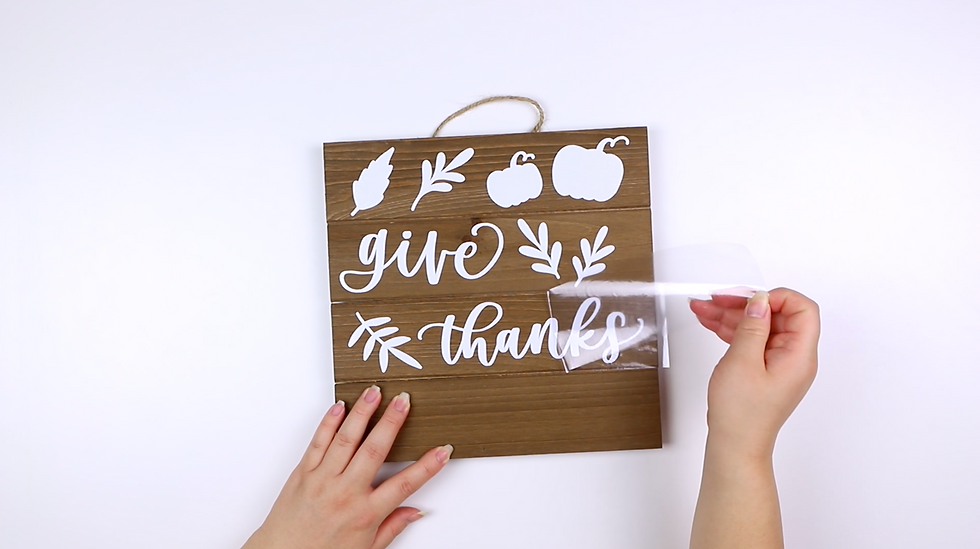
Step 3: Place the transfer tape on top of the vinyl.
Note: This method works great when the wood has a smooth finish.
Step 4: Peel the transfer tape with the vinyl and place the vinyl directly on the wood sign. Apply some pressure to make sure the vinyl adheres to the wood sign. Then carefully remove the transfer tape.
Step 5: Repeat the same steps until all the vinyl has been applied to the wood sign.
Method 2: Using the vinyl to make a stencil on the wood sign then applying acrylic paint. This method is great
if the wood does not have a smooth finish. This method also creates a textured effect.

Step 1: To make the stencil, let's keep the negatives and remove the rest.
Step 2: Cut the vinyl and transfer tape to size in order to match the wood sign. Then place the transfer tape on top of the vinyl.
Step 3: Peel the transfer tape with the vinyl and place the vinyl directly on the wood sign. Apply some pressure to make sure the vinyl adheres to the wood sign. Then carefully remove the transfer tape.
Note: Repeat the same steps until all the vinyl has been applied to the wood sign.
Step 4: Using acrylic paint and a paint brush, paint directly on the wood sign.
TIP: When using the vinyl as a stencil, it's important that the paint is applied from the edge towards the center of each design. Another option would be to dab your paint brush along the edges. This will help prevent the paint from going underneath the stencil.
Step 5: For the best results, add a second layer of paint.
Step 6: Carefully remove the vinyl. If the paint chips off, it's totally okay since we will touch-up the design.
Step 7: It's now time to do some touch-ups! Use a smaller brush to paint any areas where the paint was chipped off when removing the vinyl.
Yayyy! There you have it! Your DIY Fall-themed wood sign is now ready to use to decorate your home! I hope you enjoyed this DIY tutorial and had fun exploring 2 different methods when creating a DIY sign! Thank you for taking the time to create with me! 🍂

If you recreate this piece or create any DIY Fall Signs, please tag me on social media at @lettersbyshells. I would love to see your lovely creations and don’t forget to use the hashtag #MakeItWithMichaels!
Sending you all the love and positive vibes! I hope you have the best Fall season! :)

Comments